Garage S3 behind NPM
This document outlines how to deploy garage, an open source self hostable version of Amazon S3.
Most of this guide is adapted from the garage quick start.
Prerequisites:
- Docker
- Docker Compose (sometimes installed as
docker-compose, sometimes asdocker compose, both work) - Nginx Proxy Manager (I mean, you can use another reverse proxy. But NPM is what I use here)
- Using a docker network
Firstly, create a folder which will host the docker compose data. This folder will be called garage or similar. cd into this directory.
Below is a sample docker compose file. You may want to change the network depending on your docker network name. Run the below command to create the docker compose:
cat > docker-compose.yaml <<EOF
version: '3'
services:
  garaged:
    image: dxflrs/garage:v2.2.0
    volumes:
      - "./garage.toml:/etc/garage.toml"
      - "./meta:/var/lib/garage/meta"
      - "./data:/var/lib/garage/data"
    container_name: garaged
networks:
  default:
    external: true
    name: mine
EOF
Run the below command to create the garage.toml file:
cat > garage.toml <<EOF
metadata_dir = "/var/lib/garage/meta"
data_dir = "/var/lib/garage/data"
db_engine = "sqlite"

replication_factor = 1

rpc_bind_addr = "[::]:3901"
rpc_public_addr = "127.0.0.1:3901"
rpc_secret = "$(openssl rand -hex 32)"

[s3_api]
s3_region = "garage"
api_bind_addr = "[::]:3900"
root_domain = ".s3.garage"

[s3_web]
bind_addr = "[::]:3902"
root_domain = ".web.garage"
index = "index.html"

[k2v_api]
api_bind_addr = "[::]:3904"

[admin]
api_bind_addr = "[::]:3903"
admin_token = "$(openssl rand -base64 32)"
metrics_token = "$(openssl rand -base64 32)"
EOF
Note the $(command)’s in the file. These are actually executed and templated, when running cat, as a form of variable substitution.
docker-compose up -d to start garage.
Next up is running the commands inside docker to create the “cluster” (it will only be a single node), and the bucket. Because the garage command must be ran inside the docker container, we make an alias to make it more convinient.
alias garage='docker exec -it garaged ./garage'

garage layout assign -z dc1 -c 1G $(garage status | tail -1 | awk '{print $1}')

garage layout apply --version 1
This creates the base storage pool.
Next up is bucket and key creation:
garage bucket create bucketname
garage key create bucketkeyname
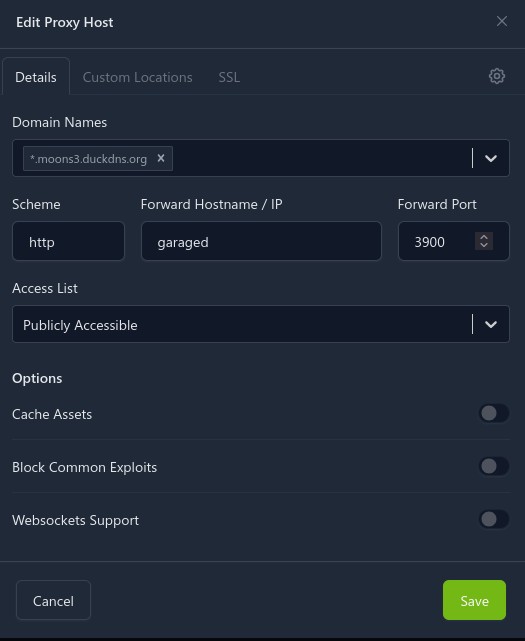
garage bucket allow --read --write --owner bucketname --key bucketkeynameNow, the reverse proxy. This is fairly simple, but you will have to use a wildcard cert, which requires a DNS-01 challenge.
In the Nginx Proxy Manager Config, new host:
And then for SSL:
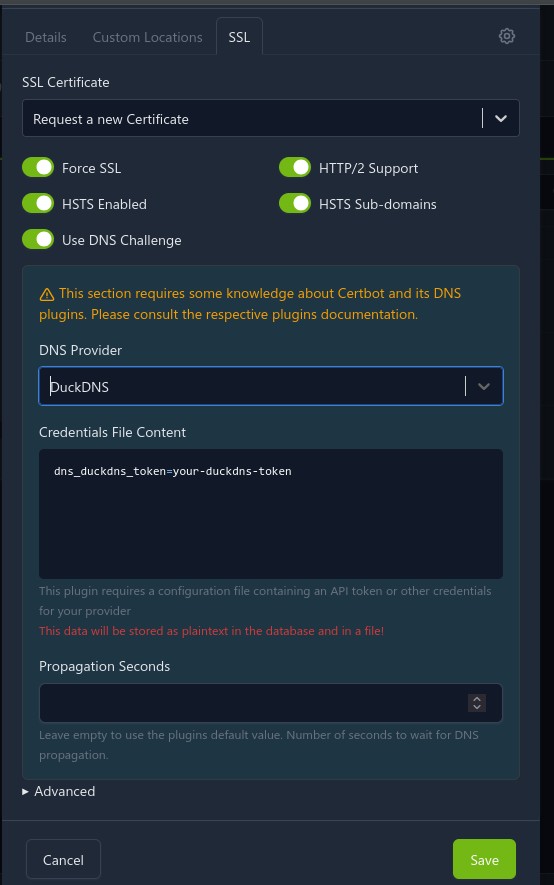
Of course, some parts may change depending on your DNS provider.
It took some fiddling, but this finally gives me Joplin sync remotely, in a secure manner (I am using Joplin e2ee).